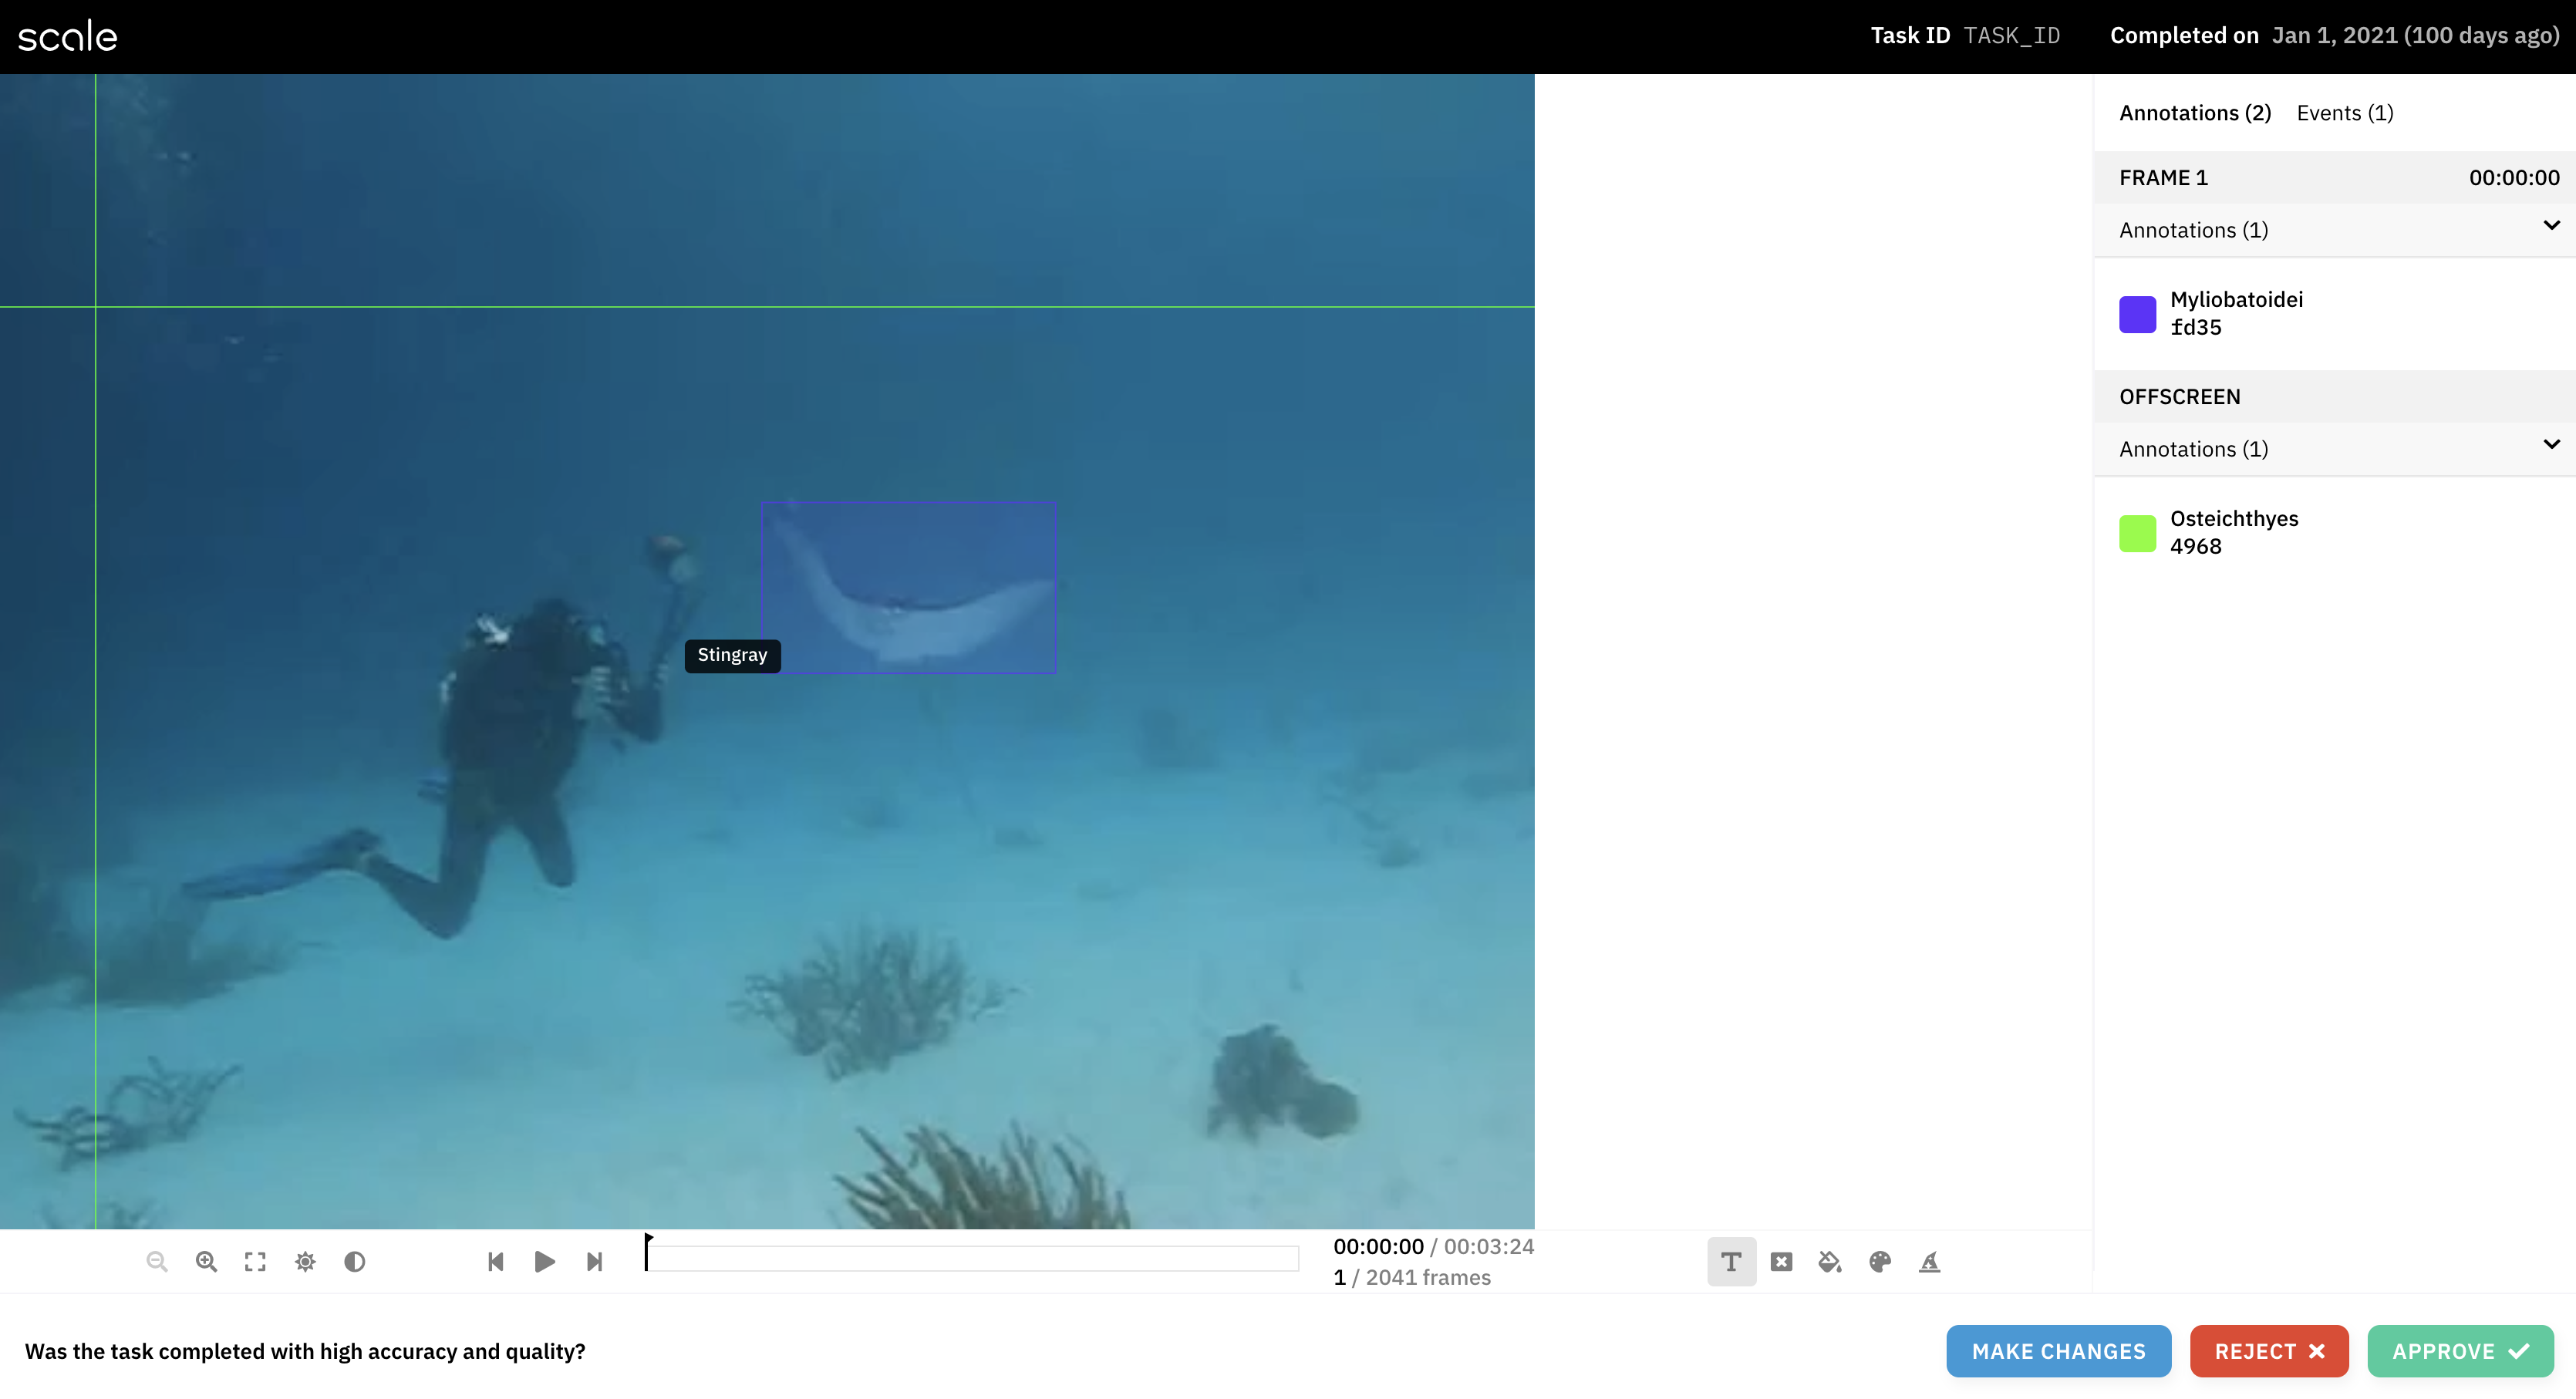
This guide describes how to use the audit interface for videoplaybackannotation tasks. Opening a videoplaybackannotation task from the Customer Dashboard brings up the following audit interface. The video is on the left side of the viewport, the toolbar is on the bottom, and the annotation and event lists are on the right. You can either approve or reject the task without making any edits (along with adding comments), or you may choose to fix the task by clicking the "Make Changes" button. Any edits you make to the task will update the response and trigger a callback to your specified callback URL with the updated response, ensuring that you receive the most accurate annotations.

To navigate through the video, use the play/next frame/previous frame buttons in the toolbar, or skip straight to a section of the video using the frame scrubber. The current frame and current time of the video are displayed on the right side of the frame scrubber.

The buttons on the right side of the toolbar are:
- Shape picker: allows you to change the shape that you are annotating with
- Show/hide labels
- Show/hide annotation fill
- Change the opacity of the annotation fill
- Change the coloring of the annotations/framebar (allowing you to make each annotation a distinct color, make each class a distinct color, etc.)
- Show/hide all predictions: display interpolations of annotations, in frames which they don't currently appear

In order to add/edit/delete annotations, draw on the labeling interface on the left.

Efficient interpolation
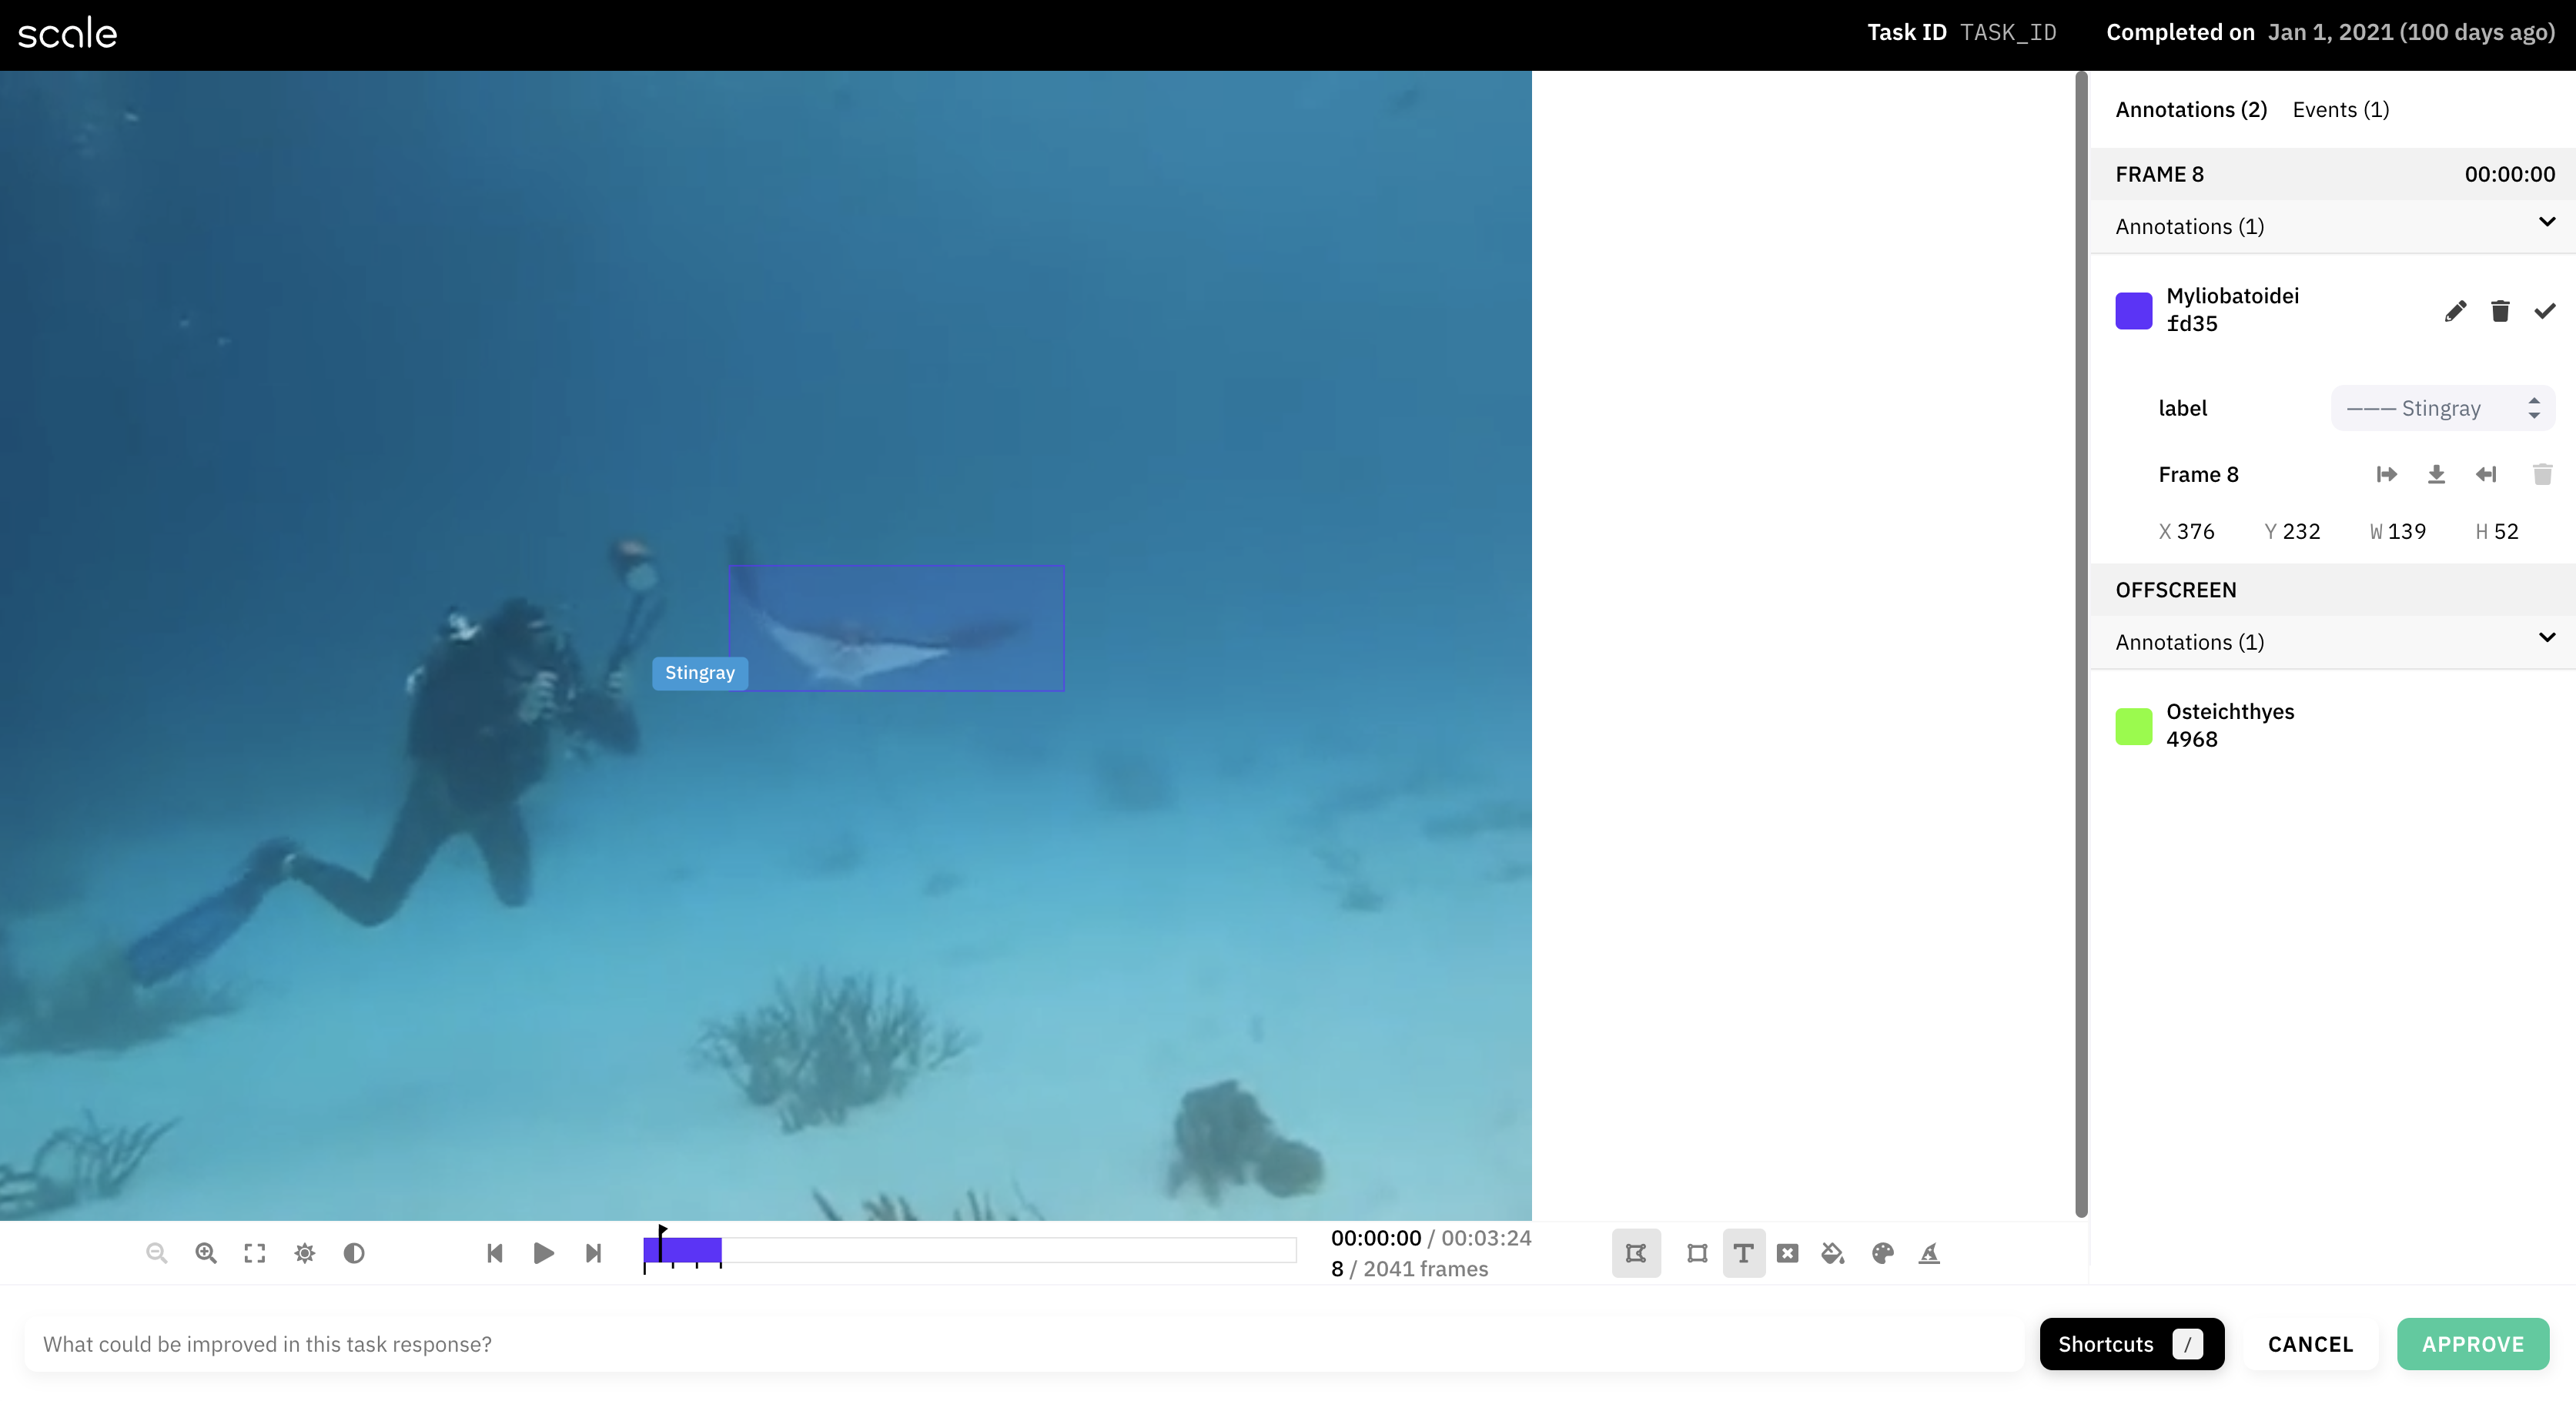
If efficient interpolation is enabled for your project, you'll be able to see the keyframes for each annotation in both the scrubber and the annotation list. With efficient interpolation enabled, interpolations are generated automatically in between keyframes, without the need to manually add interpolations to every frame.

The ticks on the bottom of the scrubber show the keyframes; start and end keyframes have longer tick marks than middle keyframes. The flag above the scrubber signifies the location of the current frame.

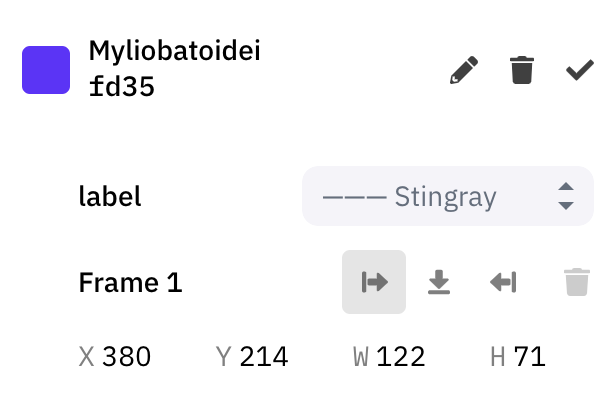
An annotation frame is automatically tagged as a keyframe if any edit is made to it, and also if it's set as a keyframe in the annotation list view. On the "Frame 1" line, the leftward, downward, and rightward-facing arrows indicate that a frame is a start, middle, and end keyframe, respectively.